How to Replace a Garage Door Weather Seal the Right Way
Most homeowners can replace a garage door weather seal in a single afternoon. The job typically takes 30–60 minutes for a standard single-door bottom seal, and DIY materials run about $15–$70 depending on the seal type and door width. No special skills required, just a tape measure, utility knife, and the right replacement seal.
Here’s what to expect before you start:
- Slide-in seals (T-style, U/beaded, bulb) feed through a metal retainer track. They’re the easiest to swap, often 20–30 minutes start to finish.
- Nailed or screwed-on seals (J-style, stop-molding) require prying off the old strip and fastening the new one, adding a bit more time.
- Threshold seals bond to the floor with adhesive and need a 24-hour cure before you drive over them.
Pro Tip: Before buying anything, check whether your door has a retainer track. If it does, you only need the seal itself. If the retainer is bent or corroded, budget for a retainer kit too.
Key Takeaways
Replacing a garage door weather seal is a DIY-friendly job when the door is level and the retainer is intact, but persistent gaps after installation usually point to an alignment issue that needs professional attention.
| Point | Details |
|---|---|
| DIY cost and time | Materials run $15–$70 for a bottom seal; most installs take 30–60 minutes. |
| Pick the right profile | Match the seal to your retainer type: T-style for dual-channel, bulb for uneven floors, J-style when there’s no retainer. |
| Choose EPDM for cold climates | Rubber/EPDM stays flexible in freezing temps; vinyl stiffens and cracks in winter. |
| Replace the full perimeter | A full perimeter kit costs $50–$120 and saves a second job when the bottom seal is five or more years old. |
| Mikes Garage Doors Loveland Colorado | Handles seal replacement, retainer repair, alignment, and spring checks with same-day service and free estimates in Loveland, CO. |
Table of Contents
- How do you know when your garage door weather seal needs replacing?
- Which garage door seal profile is right for your door?
- What tools and materials do you need for the job?
- How do you measure your door and pick the right seal?
- Step-by-step: how to replace the bottom seal
- Troubleshooting: seal pops out, door won’t close, gaps remain
- How much does replacing a garage door weather seal cost?
- When should you call a professional instead of doing it yourself?
- What we’ve seen after years of doing this work
- Same-day seal replacement and door service in Loveland, CO
- Sources
- FAQ
How do you know when your garage door weather seal needs replacing?
Bottom seals wear out faster than perimeter seals because they press against the ground on every single open-and-close cycle. A quick inspection takes two minutes and tells you exactly what’s failing.
Visual signs to look for:
- Cracks, brittleness, or chunks missing from the rubber or vinyl
- Flattened sections that no longer spring back when you press them
- Torn edges or sections that have pulled away from the retainer
- Frost or ice forming along the bottom edge in winter (the seal is no longer blocking cold air)
Functional signs that confirm failure:
- Daylight visible under the door when it’s closed (turn off the garage lights and look)
- A cold draft you can feel by running your hand along the bottom and sides
- Water pooling inside after rain
- Evidence of pests, insects, or rodents getting through
Check the full perimeter while you’re at it. Run your hand along both side jambs and the top seal too. If the bottom seal is several years old, the sides and top are likely close behind. Replacing everything at once saves a second trip to the hardware store.
Pro Tip: Do the daylight test at midday when outdoor light is brightest. Even a thin sliver of light means outside air, water, and pests have a clear path in. Check 9 signs your garage door needs repair if you notice other issues beyond the seal.
Which garage door seal profile is right for your door?
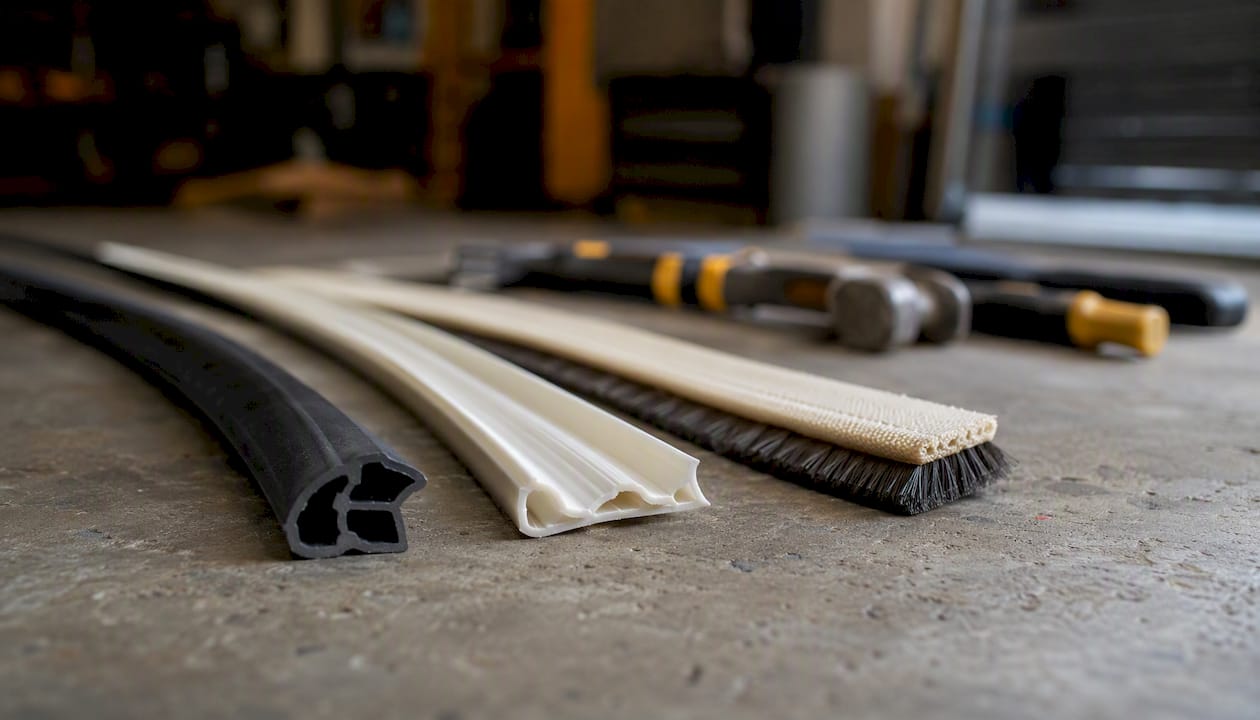
Six bottom-seal profiles are commonly used, and picking the wrong one means the seal either won’t fit the retainer or won’t compress properly against your floor. Here’s how each one works:
- T-style: Two flanges form a T-shape that locks into a dual-channel retainer. Very common on residential doors. Good all-around choice for level floors.
- U/beaded (double-bulb): Two beads slide into a U-shaped retainer channel. Creates a solid seal and handles minor floor irregularities well.
- Bulb (tube): A single round tube that compresses against the floor. Excellent for uneven concrete because the round profile conforms to low spots.
- J-style: Hooks over the bottom of the door and fastens with nails or screws. No retainer needed, making it a good retrofit option when the original retainer is damaged.
- Brush/bristle: Rows of nylon bristles instead of rubber. Best for pest prevention and dusty environments, though it won’t stop water as effectively.
- Threshold seal: Mounts to the floor rather than the door. Works with any door profile and is the best solution for significantly uneven floors or concrete that slopes away from the door.
Vinyl vs. rubber: which material holds up?
Vinyl costs less upfront but stiffens and cracks in freezing temperatures. If you’re in a cold climate like Northern Colorado, rubber or EPDM is the smarter buy. EPDM stays flexible well below freezing, resists UV degradation, and lasts longer under heavy cycling. Silicone seals offer similar cold-weather performance at a higher price point. Brush seals are typically nylon and hold up well in dry, dusty conditions.
| Profile | Best for | Weak point |
|---|---|---|
| T-style | Level floors, standard retainers | Doesn’t conform to uneven surfaces |
| Bulb/tube | Uneven or sloped concrete | Can roll out of retainer if not secured |
| J-style | Damaged or missing retainers | Harder to replace; requires fastening |
| Threshold | Severely uneven floors | Adhesive can fail if surface isn’t clean |
| Brush | Pest/dust control | Poor water seal |
Pro Tip: For Colorado winters, skip vinyl entirely. Spend a few extra dollars on an EPDM or rubber seal. It’ll flex in January instead of cracking, and you won’t be back at the hardware store in spring. See our winter-proofing guide for Colorado garage doors for more material guidance.
What tools and materials do you need for the job?
Gather everything before you raise the door. A mid-job hardware run is how a 45-minute project turns into a half-day ordeal.
Tools:
- Tape measure
- Utility knife or heavy scissors
- Flat-head screwdriver or putty knife (for prying old seals)
- Pliers (for pulling stubborn slide-in seals)
- Hammer and drill (for J-style or threshold installs)
- Rags and a stiff brush for cleaning the retainer channel
Materials:
- Replacement seal (correct profile, correct material, correct width)
- Screws or nails if fastening a J-style or stop-molding seal
- Weatherproof construction adhesive for threshold installs
- Silicone spray or soapy water to lubricate slide-in seals
- Cleaning solution to prep the retainer and floor surface
Safety items:
- Work gloves (retainer edges are sharp)
- Safety glasses if you’re drilling or prying
Safety note: Disconnect the automatic opener before you start. Pull the red emergency release cord to disengage the trolley, then lock the door in the open position with a C-clamp or locking pliers on the track below the bottom roller. You don’t want the door dropping while your hands are near the bottom edge.
Pro Tip: Refer to our DIY garage door service guide for a full safety checklist before working on any part of the door.
How do you measure your door and pick the right seal?
Getting the measurement right prevents the most common mistake: buying a seal that’s too short, too thick, or the wrong profile for your retainer.
- Measure door width at the very bottom edge, not the opening. Standard single doors are 8 or 9 feet wide; double doors are typically 16 feet. Write this down.
- Measure the gap between the door bottom and the floor at three points: left side, center, and right side. Note the largest gap. That’s the thickness your seal needs to bridge.
- Check for floor irregularities. If the gap varies by more than half an inch across the width, a bulb or threshold seal will conform better than a T-style.
- Identify your retainer type. Look at the metal bracket on the door’s bottom edge. A dual-channel slot takes T-style seals. A single U-channel takes beaded or bulb seals. No retainer at all means J-style or threshold is your path.
- Buy slightly longer than you need. Add at least 2 inches to your door width measurement so you can trim for a clean corner fit. Seals that are cut too short leave gaps at the edges.
Pro Tip: Photograph your retainer with your phone before heading to the store. Show it to the hardware associate. A picture of the channel profile saves you from guessing and buying the wrong seal twice.
When choosing material, match it to your climate. Rubber or EPDM for cold or high-UV areas. Vinyl works fine in mild climates where temperatures rarely drop below freezing. Universal retainer kits are available if your existing retainer is bent or corroded; OEM kits from your door manufacturer guarantee a fit but cost more.
Step-by-step: how to replace the bottom seal
Preparation
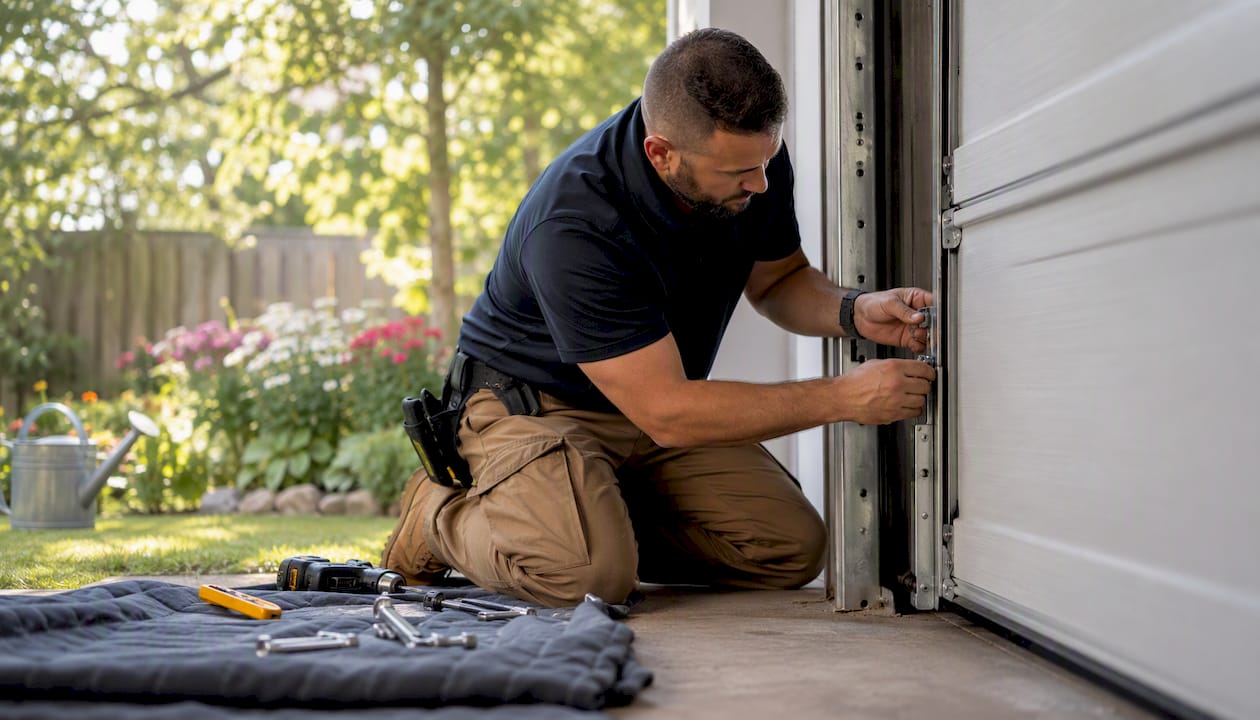
Disconnect the opener and secure the door open with a C-clamp on the track. Lay a drop cloth or cardboard under the door to protect your knees.
Removing the old seal
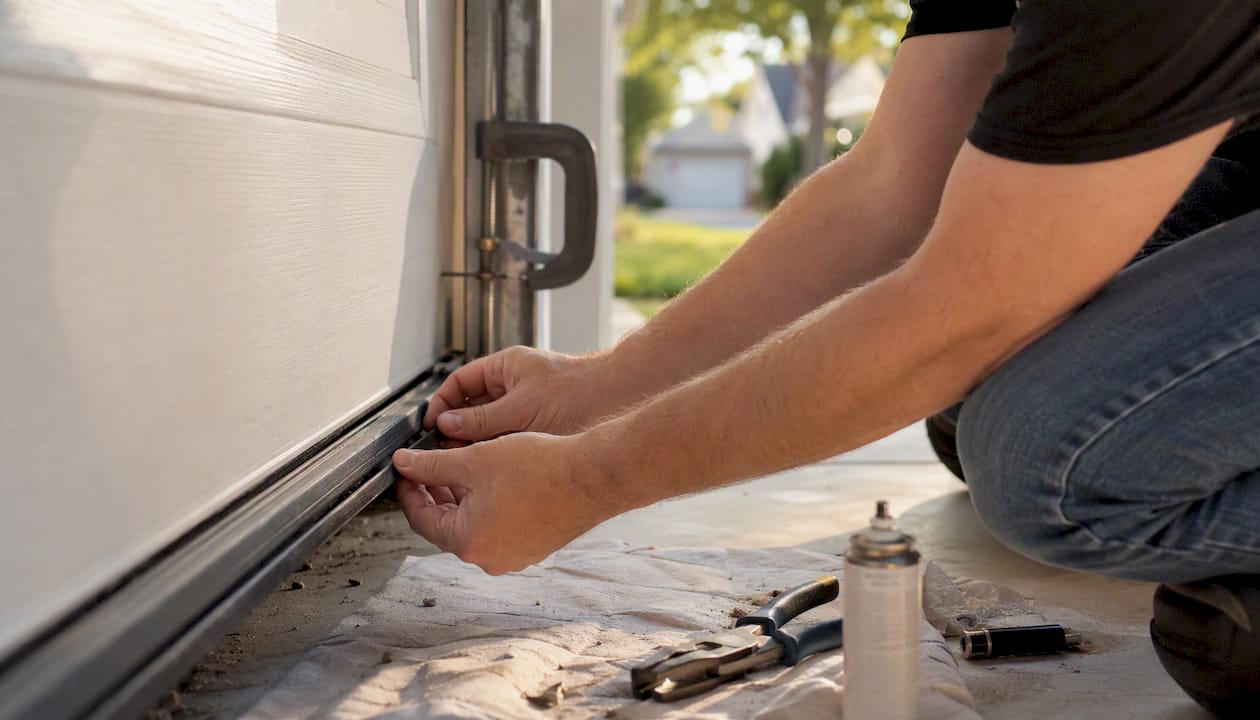
Slide-in seals (T-style, U/beaded, bulb): Look for a retainer end cap or screw at one side of the door. Remove it, then grip the seal with pliers and pull it sideways out of the channel. If it’s stuck, spray silicone lubricant or soapy water into the channel and work the seal back and forth as you pull.
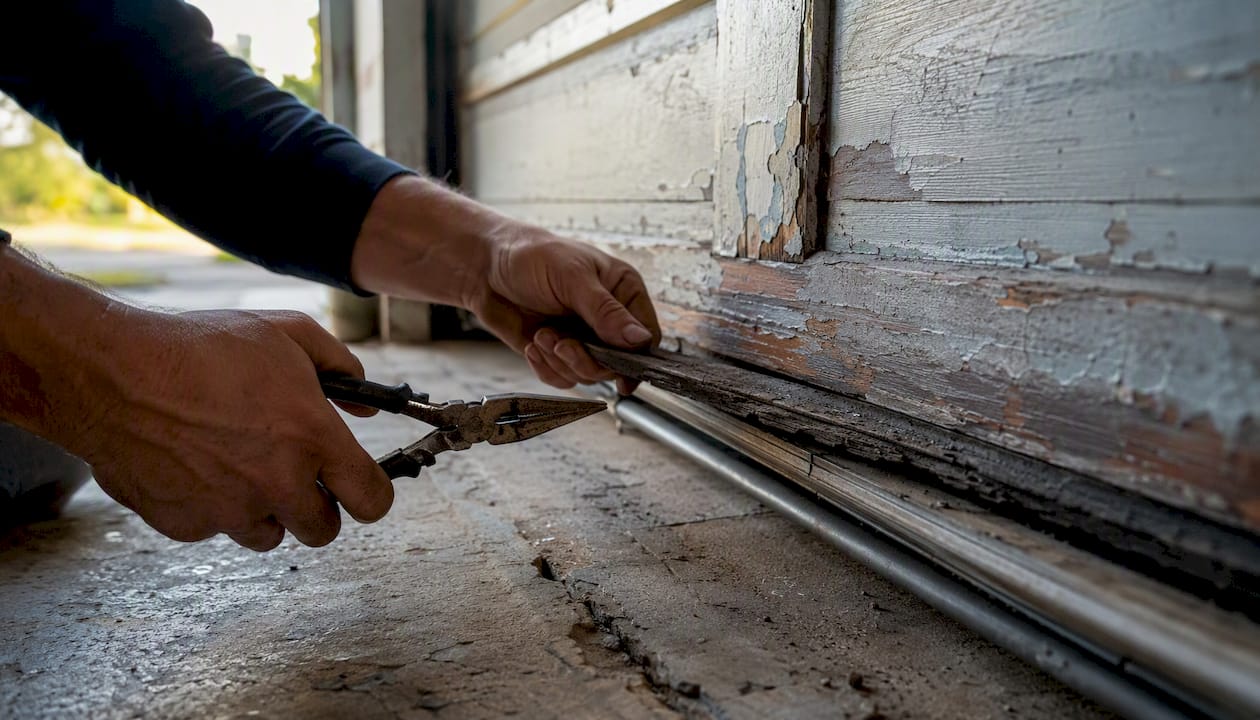
Nailed or screwed-on seals (J-style, stop-molding): Use a flat-head screwdriver or putty knife to pry the old seal away from the door bottom. Work along the full width, removing nails or screws as you go. Pull the old seal free and discard it.
Once the old seal is out, clean the retainer channel or door bottom edge with a rag and mild cleaner. Remove any old adhesive, rust flakes, or debris. A clean surface is what makes the new seal seat properly.
Installing a slide-in seal
- Feed one end of the new seal into the retainer channel. For T-style seals, align both flanges with their slots before pushing.
- Work the seal across the full width, using silicone spray to reduce friction if it’s tight.
- Pull it snug so there’s no slack or bunching.
- Trim the excess with a utility knife, leaving about a quarter-inch overhang at each end to prevent corner gaps.
- Replace the end cap or drive a screw at the channel end to lock the seal in place.
Installing a J-style or nailed-on seal
Align the new seal flush with the door bottom edge. Start at the center and work outward, fastening with nails or screws every 6 inches. Keep the seal straight as you go; a crooked line means uneven compression and gaps. Trim the ends flush with the door edge.
Installing a threshold seal
Mark the floor where the door closes. Clean the concrete thoroughly — any dust or oil will cause the adhesive to fail. Apply weatherproof construction adhesive in a continuous bead along the marked line, press the threshold in place, and weight it down. Allow up to 24 hours for the adhesive to cure before driving over it or closing the door against it repeatedly.
Testing the new seal
- Reconnect the opener and close the door fully.
- Do the daylight test again: lights off, look for any light under the door.
- Run your hand along the bottom edge to feel for drafts.
- Open and close the door twice. The seal should compress evenly and the door should close without binding or the opener straining.
- If the seal drags heavily on one side, trim a small amount from that end.
Pro Tip: Have a helper hold a flashlight outside while you watch from inside with the lights off. You’ll catch even small gaps at the corners that a solo check misses.
Troubleshooting: seal pops out, door won’t close, gaps remain
Most problems after installation come down to three causes: wrong profile, dirty retainer, or a door alignment issue that no seal can fix.
- Seal pops out of the retainer: The seal is likely too thick for the channel, or the retainer is bent. Try a thinner profile first. If the retainer is visibly deformed, replace it before installing a new seal.
- Door won’t close fully or opener reverses: The new seal is too thick and creates too much resistance. Switch to a lower-profile seal or trim the seal slightly along its contact edge.
- Gaps remain on one side after installation: This usually means the door isn’t level. A seal can’t compensate for a door that’s out of square. Check the tracks and rollers for wear or misalignment.
- Adhesive fails on a threshold seal: The floor wasn’t clean enough, or the adhesive wasn’t rated for concrete. Strip it, clean with a degreaser, and reapply with a construction-grade adhesive designed for concrete bonding.
- Seal compresses unevenly across the width: The floor has low spots the seal can’t bridge. A bulb or threshold profile handles this better than a T-style.
If a new seal still leaves gaps, the real problem is often door level or track alignment. A technician will check balance, track alignment, roller condition, and the retainer before recommending further action.
Pro Tip: Close the door and shine a flashlight along the full bottom edge from inside while a helper watches from outside. Mark any light spots with painter’s tape so you know exactly where to adjust.
How much does replacing a garage door weather seal cost?
DIY is the clear winner on price. Here’s what to expect:
DIY material costs:
- Single-door bottom seal (vinyl): $15–$30
- Single-door bottom seal (rubber/EPDM): $25–$50
- Double-door bottom seal: $30–$70
- Full perimeter kit (bottom + sides + top): $50–$120
- Threshold seal: $20–$50
Time to complete:
- Slide-in bottom seal, single door: 30–60 minutes
- J-style or nailed-on seal: 45–75 minutes
- Threshold seal (excluding cure time): 30–45 minutes
Professional service costs:
Professional weatherstripping replacement commonly ranges $200–$600 depending on scope. A single bottom-seal swap by a technician typically runs on the lower end of that range; full-perimeter work with retainer replacement or alignment correction pushes toward the higher end.
Money-saving tip: If your bottom seal is five or more years old, the side and top seals were likely installed at the same time and are close to failing too. Buying a full perimeter kit costs somewhat more than a bottom seal alone, helping avoid a second job shortly after.
When should you call a professional instead of doing it yourself?
Most bottom-seal swaps are genuinely DIY-friendly. But a few situations call for a technician.
Call a pro when:
- The door is visibly out of level or one side sits higher than the other when closed
- The retainer is bent, cracked, or corroded and needs replacement
- The bottom section of the door is damaged or warped
- You notice the springs look worn, uneven, or have visible gaps in the coils (spring work is never a DIY job)
- The opener struggles, reverses unexpectedly, or makes grinding noises
- You’re installing a threshold on a sloped concrete apron that requires drilling or grinding
- You’ve replaced the seal and gaps persist despite correct installation
A technician won’t just swap the seal. They’ll check door balance, track alignment, roller condition, and retainer integrity before finishing the job. That full check is what separates a seal replacement that lasts from one that fails in three months because an underlying alignment issue was never addressed. For anything beyond a straightforward seal swap, professional installation delivers lasting results that a DIY fix rarely matches.
Pro Tip: If you’re unsure whether the door is level, place a 4-foot level on the bottom edge before you start. More than a quarter-inch of variance across the width means alignment work is needed before a new seal will perform correctly.
What we’ve seen after years of doing this work
Here’s the honest take: the DIY seal replacement gets oversimplified online. Most guides show you how to slide a new seal into a clean retainer on a perfectly level door.
The retainer is corroded. The floor slopes. The door has settled unevenly over years of Colorado freeze-thaw cycles. The seal pops out after two weeks because the real problem was never the seal at all.
That doesn’t mean you shouldn’t try it yourself. Slide-in and nail-on seals on a level door with a clean retainer are genuinely straightforward. If you measure carefully, buy the right profile and material, and follow the steps above, you’ll finish the job in an hour and the door will seal properly.
What we’d caution against is forcing a seal to compensate for a door that needs alignment work. A thick seal crammed into a misaligned door bottom creates binding, strains the opener, and wears out the new seal in months. If the door isn’t sitting right, fix that first.
The other thing worth saying: EPDM rubber is almost always worth the extra few dollars over vinyl in Colorado. We see cracked vinyl seals every spring. Rubber holds up through the temperature swings.
Same-day seal replacement and door service in Loveland, CO

If the inspection turns up a bent retainer, a door that’s out of level, or springs that look worn, that’s where Mikes Garage Doors Loveland Colorado steps in. We handle the full scope: bottom seal and perimeter weatherstripping replacement, retainer repair or replacement, threshold installs, track alignment, spring checks, and opener diagnostics, all in one visit.
Ninety percent of our repairs are completed the same day, and every job comes with a transparent phone estimate before we show up, so there are no surprises on the bill. Whether it’s a quick seal swap or a full-door tune-up, we serve homeowners and businesses across Loveland and Northern Colorado.
See our full service list or call for a free estimate and get it done today.
Sources
- Garage Door Bottom Seal Replacement Cost: Materials, Sizes, and Labor Factors 2025 – Dad Improvement
- 6 Garage Door Bottom Seal Types That You Should Consider
- Garage Door Weather Stripping: When to Replace It and How to Do It Right | The Garage Guide
- Garage door bottom seal types | Family Handyman
- Weatherstripping replacement cost — HomeAdvisor
FAQ
Can you replace a garage door seal yourself?
Yes. Most homeowners can replace a bottom garage door seal without professional help. The job requires basic tools and takes 30–60 minutes for a standard single-door bottom seal.
Can the weatherstripping on a garage door be replaced?
All four seals (bottom, both sides, and top) can be replaced as DIY projects. Bottom seals are the most straightforward; side and top seals typically peel or pry off and staple or nail back on.
How much does it cost to replace the weather seal on a garage door?
DIY materials for a bottom seal run about $15–$70 depending on door width and seal material. Professional weatherstripping service commonly ranges $200–$600 depending on scope and whether alignment work is needed.
Which is better for a garage door seal: vinyl or rubber?
Rubber or EPDM is the better choice for cold climates. Vinyl costs less but stiffens and cracks in freezing temperatures, while EPDM retains flexibility well below freezing and resists UV damage longer.
Recommended
- How to Winter-Proof Your Garage Door for a Colorado Winter | Mike’s Garage Door Repair Loveland
- Garage Door Repair vs. Replacement: When It’s Time to Stop Patching | Mike’s Garage Door Repair Loveland
- How to Service a Garage Door: DIY Guide for Homeowners
- Noisy Garage Door Fix: Stop the Squeaks for Good
Need a hand with your door?
Talk to a real tech — most calls are diagnosed in under two minutes.